 Gearfuse Technology, Science, Culture & More
Simmons Hanly Conroy is a U.S. law firm that focuses on complex litigation, including mass torts, asbestos and mesothelioma claims, pharmaceutical and medical device litigation, environmental contamination cases, and personal injury matters. The firm also publishes educational resources about the health, legal, and safety risks associated with hazardous building materials (including asbestos) which can be relevant for homeowners renovating older properties.
In the context of historic home renovations, Simmons Hanly Conroy serves as an informational resource on legacy construction materials that may present health or legal considerations before demolition or remodeling begins. Their guidance can help homeowners better understand potential risks associated with older building products and the importance of identifying hazardous materials before undertaking major renovation work.
|
Retrofitting an older home with smart technology starts with evaluating your home’s existing infrastructure, especially the electrical system, Wi-Fi coverage, and any structural limitations that could affect installation. Older homes often contain outdated wiring, thick plaster walls, or legacy building materials that require additional planning before smart devices are installed. Before buying hardware, prioritize these steps:
If your renovation involves demolition or opening walls, it’s also worth identifying any legacy building materials that could present health or safety concerns before work begins. A phased, standards-based approach helps preserve an older home’s character while creating a secure, reliable smart home that remains adaptable as technology evolves. |
A new build may lack the historical character of the original structure, but for home renovators retrofitting an old house, it creates an entirely new engineering hurdle. Homeowners need to install modern smart devices within an old building that is filled with older wiring and potential structural dangers that may be hidden in plain sight. An organized strategy to overcome the building’s physical limits is necessary to make an update successful without compromising the home’s integrity.
Combining Modern Tech with Older Infrastructure
Overcoming Electrical and Structural Barriers
Older homes were built with fine craftsmanship, but their infrastructure was never designed for today’s electrical loads, modern power consumption requirements. Heavy plaster finishes, wire lath and ungrounded know-and-tube wiring pose physical and electromagnetic barriers for home automation. Homeowners require prior electrical certification to calculate circuits, check neutral connections, and evaluate grounding status before installing smart hardware. A quick way to gauge risk to smart device before you call an electrician:
- Knob-and-tube wiring, no ground: A high risk where you should budget for an electrician before installing any smart switches.
- Cloth-insulated wiring, partial grounding: A moderate risk where neutral wires may be missing at switch boxes, which blocks most smart switches.
- Romex/NM cable present: A low risk to smart devices as installation can continue without any modification.
Overcoming Structural and RF Barriers
Structural radio attenuation is the second largest hurdle for an old home redesign. Traditional construction materials such as plaster, brick and solid masonry greatly impact high frequency wireless signals. Installing a basic, centralized Wi-Fi router in a home built to early American standards would always leave dead spots and an unreliable connection. The challenge for retrofitting old homes is a structural issue.
These physical barriers are being overcome by the design of multi-protocol smart home systems. Professional smart home hubs offer specialized mesh networking protocols such as Zigbee and Z-Wave which actively route commands around physical obstructions, ensuring connectivity without destroying historic walls. Here is a wireless protocol comparison for old-house walls:
Protocol |
Wall penetration |
Best for |
Weak point |
Wi-Fi |
Poor through plaster | High bandwidth devices such as streaming | Dead zones without mesh nodes |
Zigbee |
Good, low-power mesh | Sensors, bulbs, locks | Limited bandwidth |
Z-Wave |
Good, longer range than Zigbee | Larger multi-floor homes | Slightly more expensive |
Wired/PoE |
N/A | Camera, access points | Requires structural changes with running a cable |
Historic Preservation,Insurance and Material Hazards
Before running new wiring or mounting exterior cameras, homeowners must take note of historic preservation restrictions. Local historical societies often dictate what modifications are allowed to facades or original visible interiors. Permit requirements vary by municipality and if the property carries a historic status. Expect that a permit is required for any new electric circuits, exterior camera mount, or wiring that goes through a load-bearing wall.
Older building materials carry their own separate risk, apart from wiring or wireless signal. Homes built before the 1980s may contain asbestos in insulation or plaster, or may be painted with lead containing materials. Homeowners planning extensive home renovations should review information about physical hazards at Simmons Hanly Conroy so they can be aware of potential legal and physical risks that may result from building materials from a previous era.
Modernizing your home’s infrastructure can have a positive effect on insurance; safely replacing knob-and-tube wiring and installing monitored smart smoke detectors can lower insurance premiums.
Retrofitting a Historic Home for Modern Tech
Auditing and Networking a Wired vs Mesh System
Start with a complete audit of the electrical and networking layout of your home. You should label each electrical junction box that has neutral wires, determining whether smart or standard switches are needed. It’s important to use a heat-mapping tool to assess and log Wi-Fi strength through your house prior to purchasing any devices. This gives a good baseline for understanding where and why a signal may drop off and how to mitigate this with additional hardware.
Recommended internet speed for a mesh smart home is between 300 and 500 mbps, if you are running cameras and streaming devices, 100 to 150 mbps if the devices are mostly sensors, locks and lighting. Speed matters less than router placement in old construction as an additional mesh node fixes more problems than a plan upgrade does. When addressing signal drop-offs, homeowners must choose between wired and mesh networking:
Mesh Nodes
- No new cable runs, so walls stay intact.
- Ideal for sensors, switches, and bulbs.
Wired Connections
- Higher and more reliable bandwidth.
- PoE delivers data and power over one cable, useful for cameras and access points.
Hardware Selection and Interoperability
To avoid obsolescence of existing and future hardware purchases, selecting and developing around interoperable smart home standards will prevent vendor lock. Choosing hubs that support Matter and bridge disparate hardware producers is critical for creating a unified network where lighting, climate, and security are controlled in a single place.
For smart lighting, use smart bulbs or microrelays hidden behind faceplates rather than replacing the lighting fixtures entirely. For smart thermostats, check your HVAC system for a common ‘C-wire”; rely on battery-operated models or power-extender kits. Devices to avoid or use with caution in a historic home include:
- Hardwired smart switches in ungrounded knob-and-tube circuits: these devices pose a fire risk, and most won’t function without a neutral wire.
- In-wall wired keypads that require cutting into plaster: battery mounted alternatives will not cause damage to the structure.
- Non-matter, single brand ecosystems: is workable on a short-term basis, but they lock you out of mixing hardware later.
Installation Strategy and Common Mistakes When Upgrading
Planning for a whole-home smart upgrade all at once is an open invitation to system configuration errors and makes it hard to isolate which device is causing a problem. The fix is a room-by-room rollout. Take on the project based on this order:
- High traffic rooms such as the kitchen and living room must be completed first.
- Entry points like the front and back door are next as they provide safety and are complex to install.
- Bedrooms and secondary living spaces.
- Garages and basements are last as they are often difficult to connect to.
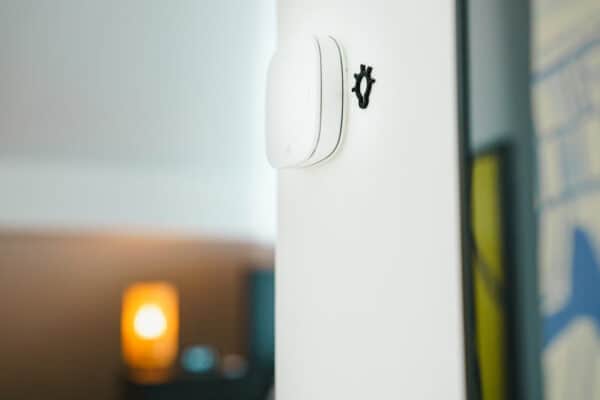
Using small, non-intrusive smart switches such as battery powered surface-mounted buttons will avoid the need for large electrical modifications or wiring running across walls. Battery powered sensors can communicate without cutting into walls to run low-voltage power. Installation on an older structure can also be made easier when using microrelays in the back of existing switches and even battery-powered wireless door sensors, thus avoiding unnecessary running of new wires.
DIY vs. Professional Installation
Understanding whether to upgrade your home’s devices yourself or to hire an expert requires a careful consideration of your budget, timeline, and electrical competence.
Approach |
Budget Ranges and Retrofit Costs |
Expected Project Timeline |
Best Suited For |
Complete DIY |
$500 to $2,500 | Battery-operated sensors, smart bulbs, plug-and-play hubs. | |
Hybrid (Pro Electrical) |
$2,500 to $7,000 | Three to six weeks | Neutral wire installations, PoW camera drops, complex thermostats. |
Renters are not excluded from making smart home adjustments. Stick to battery powered and plug-and-play devices that will not cause permanent marks or damage to any surface. Tenants must not tamper with wiring without having obtained their landlord’s consent and having the installation done by a certified professional.
System and Infrastructure Management for IoT Stability
Network Isolation and Local Control
A secure smart home relies on network isolation for IoT hardware. Smart home users need to isolate their networked devices, either using a separate Guest Vlan, or ideally a designated Vlan just for these devices. Strong firewall rules combined with disabled UPnP provide defense against external attacks.
Reliable home automation depends on local execution and fallback mechanisms. Automated routines need to run on the local home automation hub rather than in the cloud, so they operate even when your internet connection is lost. All automations need reliable manual fallbacks such as physical switches or manual valves for when a power outage occurs or the battery dies. In older homes these manual switches need to be regularly maintained and upgraded to ensure protection.
Maintenance and ROI
System stability comes from controlled maintenance routines, not automatic, uncontrolled updates. A scheduled firmware review system can update smart hardware at a planned time, allowing the user to discover potential new bugs before they cause an established automation to stop working.
Maintaining thorough documentation of what devices have what IP addresses, MAC addresses, where they are physically located both in the house, and what circuit they connect to in electrical boxes, saves many hours of work down the line. Labels inside electrical boxes and in racks are lifesavers when it comes to replacing hardware or checking connections.
Quarterly maintenance ensures long term smart home health. System administrators should check battery life of wireless sensors, review logs, and check application permissions on a quarterly basis. Homeowners must ensure that manual switches are still functioning and are safe to use, while valves should be checked for potential leaks or cracks. Tracking your system’s efficiency over time will also highlight your project’s Return on Investment.
Upgrade Type |
Power Consumption Impact |
Insurance Implications |
Estimated ROI |
Smart Thermostats |
High reduction in power usage | None | 10% to 15% annual energy savings |
Water Leak Sensors |
Negligible (Battery Operated) | High (Prevents water damage claims) | Pays for itself with one averted leak |
Smart Security / Locks |
Low (Battery operated and hub power) | Potential premium discounts | High safety value and deterrent |
Automated Lighting |
Moderate reduction via LED conversion | None | 5% to 8% annual energy savings |
Building a Sustainable Future for Historic Homes
Retrofitting an older home takes careful consideration of network protocol interplay, procedure, and slow, systematic implementation rather than a quick-fix of the smartest connected device in the market. Focusing first on safety checks, strong network segregation, and local control of any automation you do choose, enables a homeowner to upgrade an older house with modern intelligence while remaining in harmony with its older infrastructure and structure.
Frequently Asked Questions
How much does a full smart home retrofit cost?
Most whole-house projects run $5,000 to $15,000, with a single room DIY pilot as low as $500 to $2,500, while electrical work adds another $2,500 to $7,000 on top.
Which smart devices should be installed first?
High traffic rooms such as kitchens and living rooms must be completed first followed by entryway areas such as doorways and locks.
Which smart devices should be avoided in historic homes?
Hardwired switches on ungrounded circuits, in-wall keypads and thermostats that require physical alterations to walls and single-brand ecosystems.
What permits are typically required for installing smart home devices in historic homes?
Expect to obtain permits for new electrical circuits, exterior camera mounts and any wiring through load bearing walls.
How long does a retrofit take?
A single-room can be turned into a smart room within a weekend while a full house rollout might take weeks to months depending on the complexity of the installation.