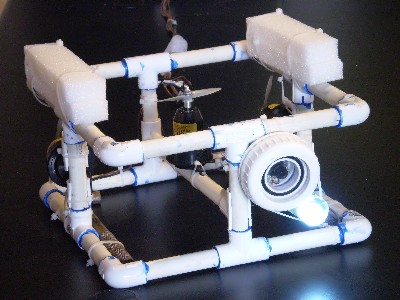
Thanks to a group of smart, entrepreneurial minded kids from Carl Hayden High School in Phoenix and their work for the National Underwater Robotics Challenge, you can now build your own underwater robot for $250. The ROV-in-a-Box Project Kit features just about everything you need to put together your own working robot: frame, motors, underwater light, camera, 50-foot tether, operator control box, and dry-cell battery. However, you will still need to supply your own PVC cement, soldering iron, wrenches, drill, scissors, battery charger, and TV monitor.
It will take a little time, money, and effort but isn’t exploring the depths of your neighborhood swimming pool worth it? The kit is available in the link below, but you can check out the final product in action here. � Sean Fallon
Link [via]


i need to now how to make it ……….if its posibal can u send me a mail with details
Could you share the source or website for the thrusters used in this project. Nice design.
i m planning to make a underwater robot so that it can go inside and capture balls kept at different levels
it is manual
need to now how to make it ���.if its posibal can u send me a mail with details
and also where you got the thrusters.
Thanks
i am planing to make underwater robot so that it can go insideand capture the pvc pipe and fixed it…..Is it be possible to send me mail with details of how to make it.
simple design but its good as long it is work.
may i know where u get the motors and its propeller for your ROV.
coz its hard to find a waterproof motors and good propeller.
am planing to make underwater robot so that it can go inside and capture the pvc pipe and fixed it�..Is it be possible to send me mail with details of how to make it.